• Members of the previous forum can retrieve their temporary password here, (login and check your PM).

Light intensity, fertilizing & cloning of Salvia divinorum (Sterling Bunnell 1962 strain)

Migrated topic.

Cosmic Spore

☠ ⚡ ☣ ⚠ ☢
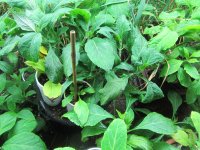
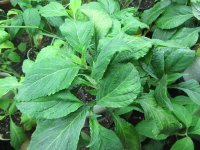
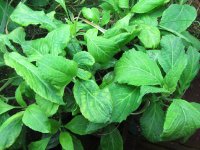
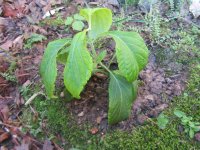
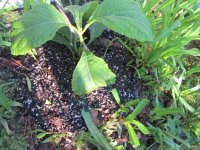
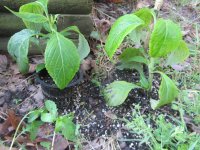
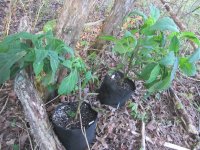
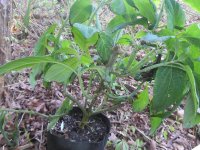
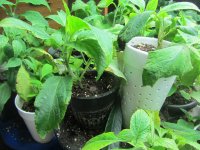
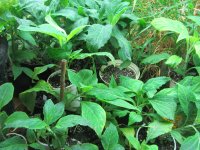
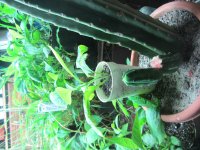
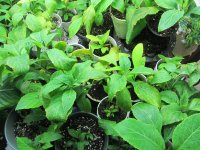
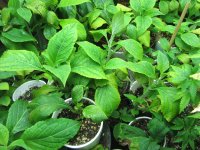
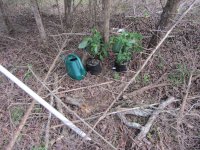
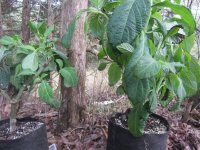
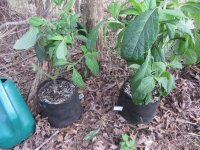
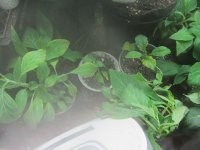
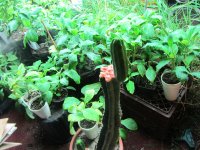
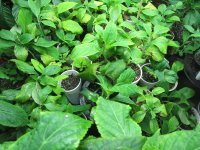
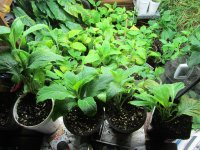
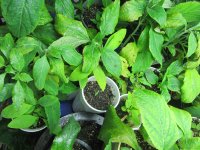
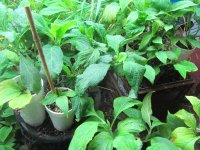
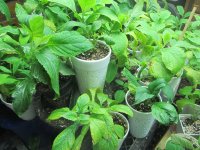
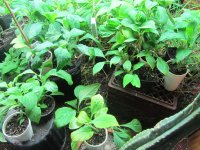
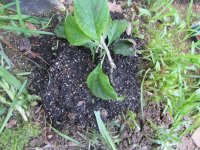
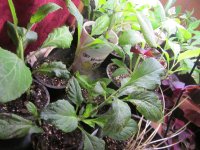
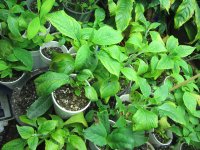
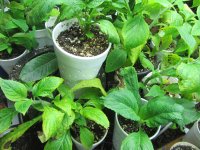
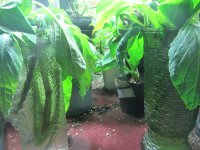
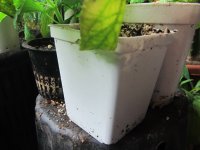
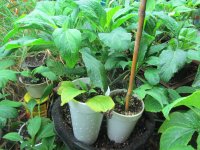
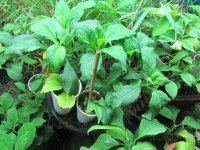
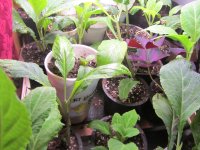
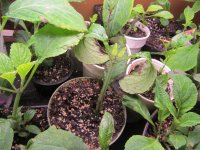
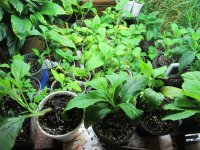
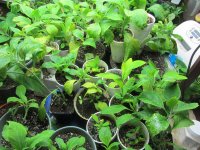
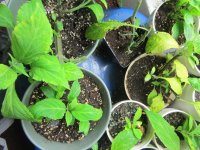
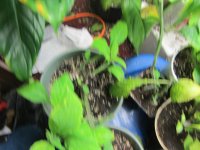
I started by purchasing 5 Bunnell clones; 4 later died due to being transplanted into containers that were too large and held too much water, combined with light intensity being low. The surviving clone was within a plastic container which holds less than 1 gallon; the dead plants were contained within 5 gallon Smart Pots (too large of a container for Salvia divinorum plants that are not mature). After this, I purchased six additional Bunnell clones, transplanted them into 1 gallon Smart Pots, and paid special attention to environmental conditions. Note: I highly recommend using as small as container as will suffice. After my clones get roots, I transfer them into medium size Styrofoam cups due to their size and availability; when the plants get large enough to be transferred, I transplant them into 1 gallon Smart Pots, which drain well and work great. I transplant them when roots are clearly visible emerging from the underside of the container, and so far, my largest containers in use are the 1gallon Smart Pots; if necessary, my plan is to transplant from 1 gallon Smart Pots to 5 gallon Smart Pots. Note: I’m skeptical that the gallon sizes advertised are not consistent with what a 5 gallon plastic bucket could hold; Smart Pots hold less in my experience.

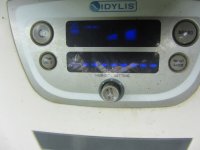
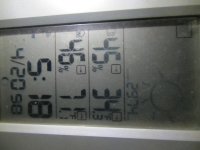
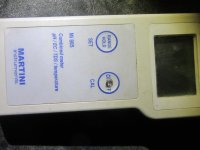
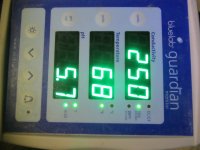
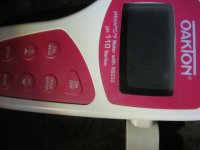
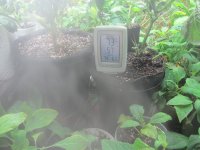
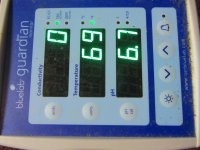
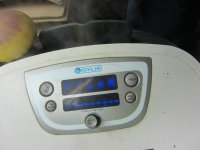
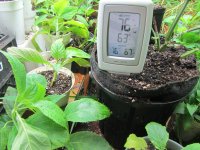
Humidity in the air ranged from 55-80%rH (most often the humidity was around 60%rH). The pH of the fertilization solution was occasionally monitored with a Milwaukee brand Martini Instruments 805 digital meter (pH, EC, TDS, & temperature); a bluelab guardian meter was also used during those times just to double-check readings (displays EC, TDS, or PPM, displays temperature & pH): the pH was left unadjusted if the meter read between 6.3 pH and 6.7 pH. I now have wonderful success (possessing between 73 and 76 rooted Salvia plants); at my location, winter temperatures get well below 32 degrees Fahrenheit, so attempting to get them to grow wild is out of the question; however I would like to produce a few seeds. Side Note: The company Milwaukee’s meters (I have access to multiple of them) are not accurate enough for me, so Cosmic Spore does not recommend purchasing a Milwaukee meter, same advice goes for the bluelab guardian meter (I have access to two). In the future, pH measurements could be taken with a much more accurate Oakton pH 110 series digital pH meter (which I only recently acquired access to… almost unrestricted access, and I do recommend the Oakton). In the last year or so, the most accurate meter that I had access to was the Milwaukee Instruments brand Martini 805 meter.

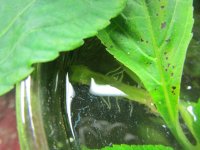
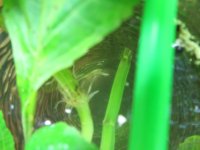
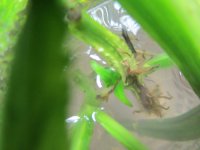
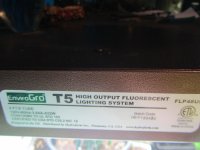
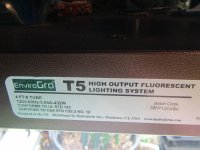
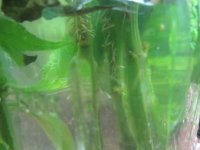
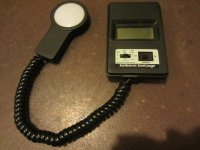
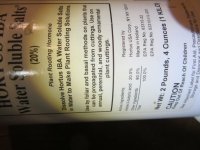
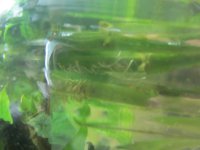
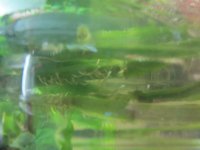
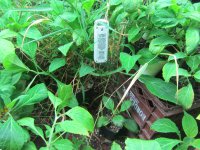
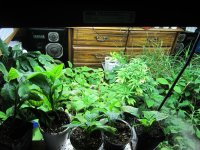
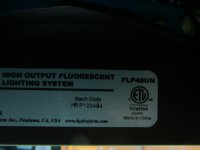
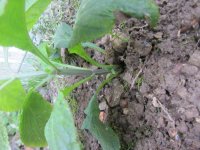
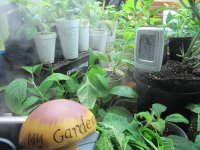
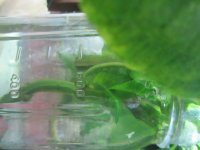
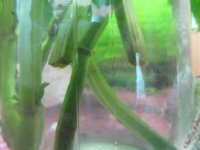
Foot-candles (ft-c) were measured with a digital foot-candle meter (brand: Sunleaves SunGauge; date measured: April 6, 2013& April 7, 2013). Bunnell cuttings rooted at 290-350 footcandles under fluorescent light 24/7 (Two Envirogro brand T5 high output fluorescent lamps- 432 total watts per lamp, all 8 light bulbs per lamp). Hortus brand 20% K-IBA (potassium indole-3-butyric acid; water soluble rooting hormone; 20% IBA) was used @ a rate of 0.23 grams/gallon, which produced roots between 70% & 75% of the time; when used at a rate of 0.30 grams/gallon it produced roots between 80% & 85% of the time. The rooting solution was neither chilled, nor aerated with a small aquarium air pump (which often improves rooting in a different special plant; Salvia cuttings were rooted within room temperature solution). NOTE: to help keep micro organismal growth to a minimum, UC Roots brand hypochlorous acid was used at a rate of 4-6mL/gallon EVERY TIME solution was replaced. Cloning solution was replaced each 10-14 days, OR any time the following signs are noticed dealing with the rooting solution: a film or bubbles floating in the glass, the solution turns tan/brown, organic matter sitting on the bottom of the glass, or a slimy film develops on the submerged twig area. Note: It was not unusual for Salvia cuttings to begin to decay at the lowermost submerged portion, in which case the stem’s mushy area and/or rotting area were cut off with scissors. When cuttings were taken for clones, the plant was cut by scissors horizontally, instead of cutting at a 45 degree angle; then placed in the rooting solution described above. Clones were planted when the roots got between 1.5 centimeters and ¾ inch; best success occurs when the “to-be-underground” stem area has a minimum span of 4.5 centimeters that have roots 1.5cm- ¾ inch in length.

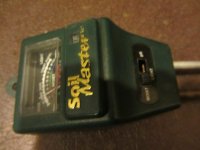
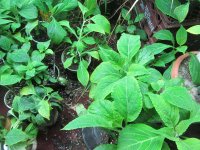
Plants were fertilized with Cal Mag & Ionic [grow]. Typically, I give them water, let dry, give them water, let dry, then fertilize with nutrient solution. Mature looking plants with shoots around 7’’ minimum were fertilized with between 900 ppm and 1,050 ppm total; 250-300 ppm of that total being Cal Mag & 700 ppm Ionic (roughly 2 portions Ionic to every 1 portion Cal Mag). Moderately well rooted cuttings with shoots 3’’ to 6’’ in length were fertilized at 250-325 ppm total, same proportions. Potentially rooted cuttings & questionably rooted cuttings are either given plain spring/creek water (0-4ppm), or given rooting solution mixed with hypochlorous acid (usually I water 2 separate times with rooting solution, followed by 2 separate watering of water only; remember to let the soil dry between watering instances; I measured moisture content in the dirt with a cheap soil meter, Soil Master brand; I water any time the meter reads less than the halfway point between 3 and 4 & avoid constantly saturated soil).

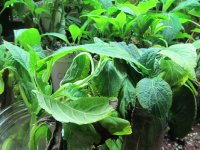
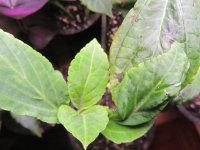
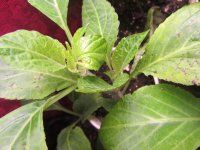
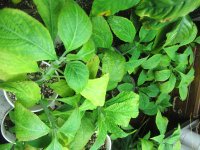
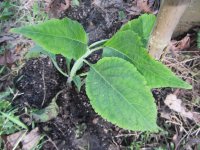
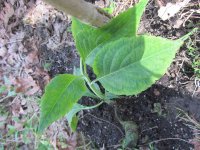
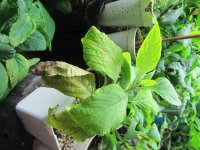
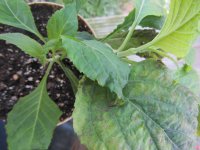
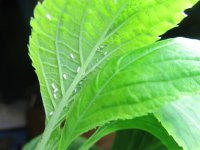
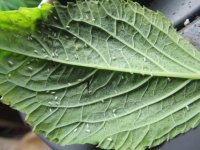
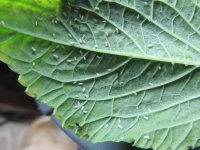
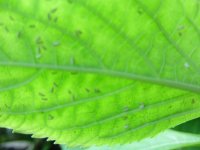
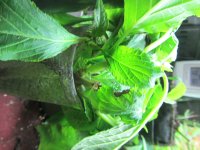
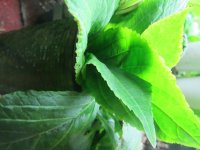
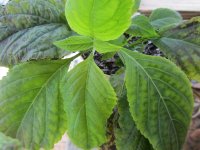
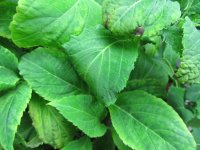
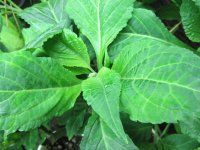
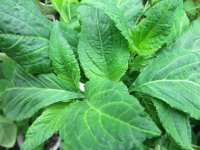
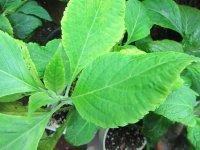
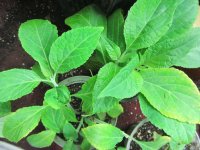
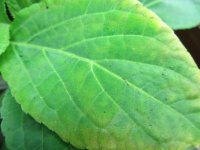
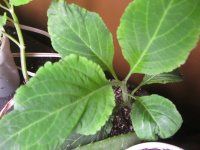
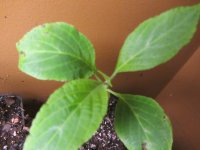
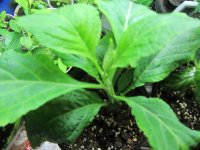
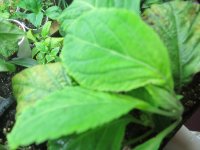
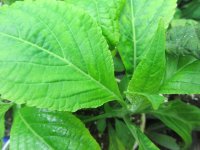
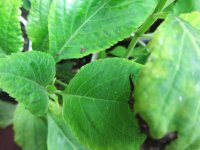
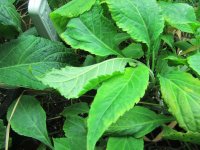
Plant Shoot Length: #foot-candles (ft-c): Presence or Absence of Interveinal Chlorosis

2’’ rooted clone: 254ft-c: interveinal chlorosis noted (mostly mild/partly moderate).

3 3/4’’ rooted clone: 186ft-c: no interveinal chlorosis noted.

4’’ rooted clone: 187ft-c: no interveinal chlorosis noted.

4’’ rooted clone: 680ft-c: interveinal chlorosis noted (1 leaf moderate & 2 leaves mild).

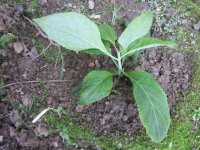
6’’ rooted plant: 143-147ft-c: no interveinal chlorosis noted (intermodal stretching & top
leaves reaching).

6’’ rooted plant: 818ft-c: widespread interveinal chlorosis noted (plant will survive; leaves don’t drop).

7’’ mature plant: 220ft-c: barely noticeable interveinal chlorosis noted.

7’’ mature plant: 340ft-c: mild interveinal chlorosis noted.

8’’ mature plant: 281-306ft-c: no interveinal chlorosis noted.

8’’ mature plant: 281-311ft-c: very, very mild interveinal chlorosis noted.

8’’ mature plant: 253-475ft-c: mild interveinal chlorosis noted.

8’’ mature plant: 480ft-c: widespread, yet mild interveinal chlorosis noted.

14 ½’’ mature plant: 34-460ft-c (most of plant is receiving 355ft-c): 99% chlorosis free (yellow apex).
 

Attachments

  • IMG_1395.JPG
    IMG_1395.JPG
    1.8 MB · Views: 0
  • IMG_1396.JPG
    IMG_1396.JPG
    2.4 MB · Views: 0
  • IMG_1397.JPG
    IMG_1397.JPG
    2.6 MB · Views: 0
  • IMG_1398.JPG
    IMG_1398.JPG
    2.4 MB · Views: 0
  • IMG_1399.JPG
    IMG_1399.JPG
    2.4 MB · Views: 0
  • IMG_1400.JPG
    IMG_1400.JPG
    2.4 MB · Views: 0
  • IMG_1401.JPG
    IMG_1401.JPG
    2.2 MB · Views: 0
  • IMG_1402.JPG
    IMG_1402.JPG
    2.6 MB · Views: 0
  • IMG_1403.JPG
    IMG_1403.JPG
    2.3 MB · Views: 0
  • IMG_1404.JPG
    IMG_1404.JPG
    2 MB · Views: 0
  • IMG_1405.JPG
    IMG_1405.JPG
    2 MB · Views: 0
  • IMG_1407.JPG
    IMG_1407.JPG
    2.2 MB · Views: 0
  • IMG_1395.JPG
    IMG_1395.JPG
    1.8 MB · Views: 0
  • IMG_1394.JPG
    IMG_1394.JPG
    1.8 MB · Views: 0
  • IMG_1382.JPG
    IMG_1382.JPG
    2.6 MB · Views: 0
  • IMG_1383.JPG
    IMG_1383.JPG
    2.9 MB · Views: 0
  • IMG_1384.JPG
    IMG_1384.JPG
    2.7 MB · Views: 0
  • IMG_1385.JPG
    IMG_1385.JPG
    3.1 MB · Views: 0
  • IMG_1386.JPG
    IMG_1386.JPG
    2.7 MB · Views: 0
  • IMG_1387.JPG
    IMG_1387.JPG
    2.6 MB · Views: 0
  • IMG_1388.JPG
    IMG_1388.JPG
    3.1 MB · Views: 0
  • IMG_1390.JPG
    IMG_1390.JPG
    1.4 MB · Views: 0
  • IMG_1391.JPG
    IMG_1391.JPG
    3 MB · Views: 0
  • IMG_1392.JPG
    IMG_1392.JPG
    2.6 MB · Views: 0
  • IMG_1393.JPG
    IMG_1393.JPG
    3.2 MB · Views: 0
I'm guessing you already know this, but if you are seeing interveinal chlorosis, your plants might want some more nitrogen. Also in those last two pics, the spotty/yellow foliage almost looks like magnesium burning.

Thanks for posting the grow log, I like to see Salvia being propagated!
 
Is it common for yours to randomly have leaf collapse? Mine were growing great, and all of them at once just started having leaves shrivel up, but only the newer growth.

I envy your wonderful grow room!
 
Nice Garden!!!

Nitrogen deficiency would be more of a general chlorosis. Intraveinal chlorosis and the leaf margins turning yellow are more associated with Mg deficiency, especially if it progresses from the older growth first. Although so many things can cause intraveinal chlorosis. It could also be nutrient lockout from too much CalMag - how many ml/gal are you using? Check your tap water for ppm also, in case it's coming with some already in it.

One other tip, I'd recommend you only use smart pots for your final destination as they're a serious pain to up-pot from compared to regular plastic pots. You'll usually bash the root system up quite a bit trying to remove the plant. Whereas with a plastic one you just let it get root bound a bit, dry out, tap the bottom, and there you go!

Any pics of the cloning system? Do you have a mister box with plugs or some type thing? I just dip mine in IBA powder then a rock wool cube, cheap easy and works like a charm.
 
Mr.Peabody said:
Is it common for yours to randomly have leaf collapse? Mine were growing great, and all of them at once just started having leaves shrivel up, but only the newer growth.

Was there a heat spike or anything that changed much? Post some pics so we can take a look an try to see what's going on
 
If you haven’t read it already, please check out “Cosmic Spore’s Introduction Essay”. It’s long, but it’s a fairly good representation of my story of how I came to be a posting member, relevant things about me, and specific questions that I have about the nexus that could be addressed/answered more thoroughly IMHO.

To clarify, I don’t claim to be an expert at growing any type of plant, and advice is welcome. I am merely having good, but not asymptomatic, success with Salvia and thought I’d mention what I was doing. Many of my plants are root-bound; all of my most symptomatic plants are root bound. I’ve heard this can alter pH in the root-zone. Nutrient availability to plants is affected by pH, and I’ve heard that with a high root to soil ratio, it’s harder to buffer the pH of the root-zone. The reason I have not up-potted many of them is I wanted to try to find suitable soil in the wilderness very close to me in the woods- once I’m confident the light intensity they will be receiving will be within a good range. I wish to avoid buying more dirt, if possible. The plan is to carry them outdoors within the next few weeks, flush them with pure water (while checking pH & ppm of the run-off), let dry, then plant into the ground in hopes of getting just a few, if any seeds. In the future I hope to do an extraction on the dried whole leaves mostly, and run a much smaller batch of frozen-fresh leaves through a set of advanced filtration bags that I already have; get the goo that remains within the most fine bag, bioassay it & possibly report back what I thought about their differences & similarities of experience between that goo, enchanted salvia leaf, and relatively pure extract. That last sentence is fairly far into the future though, multiple months.


To Ilex:

Thank you for the advice; I was aware of the nitrogen deficiency symptom, however I have some approximately equal size plants looking good that are given approximately the same feeding schedule and concentration of fertilizer (differences are container sizes and light intensities). There may be some nitrogen deficiency occurring, however, due to the following facts: #1. I only fertilize approximately each 3rd watering; (example: water, water, fertilize) & when I do, I only add it to the dry plants. #2. A few times during my fertilization schedule, I could have simply ran out of mixed fertilizer, and supplemented with only water, however, I have attempted to minimize this type of circumstance. I am attempting to find the number of foot-candles they will tolerate well, so I assumed most of the interveinal chlorosis was due to those plants receiving more light than they can tolerate; I was aware that magnesium burn symptoms included small areas upon the leaves (often circular) that look like small dead spots on some leaves. However, I wasn’t aware that magnesium burn symptoms include chlorosis until after u mentioned it. Thank you for the tips; I will look into that further. Update: after getting further consultation, I hear that with nitrogen deficiency (nitrogen being a mobile element), chlorosis begins at the bottom set of leaves, working its way up the leaf sets… for the most part, I don’t think this isn’t what I’m experiencing with the plants within containers larger than the medium-sized Styrofoam cup size; more than half of the plants in containers approximately that size, if they appear to have chlorosis, it appears mostly in areas mostly at the top leaves and middle sets of leaves. The plants that do appear to have chlorosis originating from the bottom sets of leaves are in the smallest containers (smaller than a medium-size Styrofoam cup); many are in reused square shaped containers that other my originally-ordered Salvia plants arrived in; many other plants showing nitrogen deficiency symptoms are within 4’’ wide by 3’’ tall. I will add a slightly higher amount of Ionic within the next 2 days and watch for the plants to respond. Thanks again for your reply.


To Mr. Peabody:

Thank you for your reply. IME, wilting of both plant stalk and leaves simultaneously has had three causes: overwatering, under-watering, or not intense enough light- in order of decreasing likelihood. It’s my understanding that you are mostly talking about leaves of the new growth collapsing. Approximately what was the plant container size that you used? I could be wrong but I’ll take a WAG- I suspect your soil moisture was likely on the moist side, or the dry side (more likely moist than dry). I would like to mention that 4 of the first 5 I purchased were growing great. I accidently “destroyed” the 5th plant down to soil level, so I did not up-pot it to a 1 gallon Smart Pot, which I did the other 4. The transplanted 4 plants continued to look great for weeks, until, one day before school, I noticed that my soil was slightly too moist, and I had previously no real clue as to a tolerable light intensity, so the light was about 4.5ft above canopy level and only half the # of bulbs within it turned on. When I returned 4-5nhours later, the light had been unplugged during my absence, and all 4 beautiful plants were lying flat and hanging- stalk and all; unrecoverable. Along similar lines, I have noticed, since you mentioned it, some leaf collapse mostly associated with plants in the smallest containers (Net Pots style pots 4 inches wide by 3 inches tall). These Net Pot style pots are the kind often used with Flood & Drain systems. Other than that, a slightly higher number of plants have leaf tips that seem to appear to dry out and die- this usually only includes the leaf tip. I recommend you try again with a smaller container (holds less moisture), a container that drains more quickly, or use a soil that drains more quickly- in order of decreasing helpfulness- most likely. Thanks again for your reply.


To oldsoul:

Thank you… I totally dig what you’re saying about potential magnesium lockout. Typically I don’t measure the mL of Cal Mag per gallon, just the ppm of the solution after I add it until it reaches 350-400ppm with just Cal Mag & water then add the Ionic until desired total ppm is reached. It is possible that I have added too much Cal Mag. Also, there are plants where it starts at the base set of leaves, but they # less than half of the symptomatic plants. Most seems to be associated with the upper and mid-regions of the plants. Most of the chlorosis I see happens to be associated with plants in the smallest containers, and also plants getting the most intense artificial light. Good tip about the Smart Pots by the way, I do have experience removing plants from Smart Pots, especially the larger Smart Pots, which these are not. After the damage is done by removing the Smart Pot, I “water-in” with the same mix of rooting solution as I originally transfer the clones into, in order to assist recovery of the root-zone. I mainly prefer the Smart Pot brand pots because of the high oxygen content, and the fast drainage. I, however, only have a handful of 1 gallon size Smart Pots. For Salvia plants, I do not use a physical cloning system. I just take the clones horizontally with scissors, and then put it into a drinking glass (or occasionally a jar) which is filled with the rooting solution described in the 1st post. I have used an E-Z clone system repeatedly with success with non-Salvia, but never even tried it with Salvia; long story.
 
Before the Wednesday (4/10/13), I had been fertilizing with a total ppm of 900-1,050 ppm; after I received some advice from fellow members, I have since increased that to 1,150-1,200 ppm total (so far), and attempted to use just slightly less Cal Mag. The last few watering periods have I have used this higher concentration of fertilizer, and have temporarily shifted my fertilization schedule to fertilizing every watering, instead of every third watering.

After Ilex sort of recommended an increase in nitrogen concentration to reduce the chlorosis & mentioned I had Magnesium imbalance symptoms, I spent some time considering that. I have since attempt to follow this advice, & to watch the plant response. I have included pictures (taken 4/13/13, before the clones were cut). In the pictures, many seem to be recovering slightly, as of 4/13/13. It could just be me, but since 4/15/13, I think I notice additional symptoms of what looks to be magnesium imbalance (will post pictures very soon after this post).


A day or so after I increased the concentration of the nutrient solution, I performed an inspection on my light bulbs within the fixtures (4/13/13): 25% of my 16 bulbs were shot: I had replacements on hand, so I replaced the 4 shot bulbs; ¾ of the shot bulbs being within the same light fixture. By replacing them, this would necessarily increase light intensity to plants under that light fixture; at this point, the plants under the light that had 3 shot bulbs have less chlorosis, look healthier, and are generally more green than the plants do that are under the light fixture that has had only 1 non-functional bulb recently. (I will continue to monitor that situation, and as I soon mention, I have removed most of the areas with significant chlorosis). I haven’t yet measured the light intensity since the non-functional bulbs were replaced.


My tap water comes from a creek, not far from a spring; usually the ppm measures 0ppm. After a heavy rain, it may elevate to around 15 ppm. Since the afternoon of 4/10/13, this is what I have been using as fertilization solution:

I added Cal Mag to the water at a concentration of 250 ppm.

I added Ionic grow to that solution until the total ppm read 900-950 ppm.

I added MiracleGro Quick Start to that solution until the total ppm read 1,150-1,200 ppm.


I then adjusted the pH, as necessary to between 6.3 pH & 6.7 pH.
[To lower pH, I use phosphoric acid; to raise pH, I use either Earth Juice pH up powder (if I don’t wish to raise ppm), or I use Silca- potassium silicate- to raise the pH (if I do want to slightly raise ppm); I rarely use the Silca].


Before, and during the time period that I began increasing fertilizer strength, I have been moving some of the healthiest and most fully green Salvia plants outdoors into areas I suspected they could tolerate the light intensity and soil moisture content. Within 2-3 weeks, I intend to have moved the majority of the plants outdoors (after a little more effort into field study). Also, I have cut around 10 more attempted clones; the areas I chose to utilize as clones were almost all of the areas showing significant interveinal chlorosis (these pictures were taken about half a day before I took the clones). If chlorosis shows up again significantly, I am considering combinations of 5 options with decreasing likelihood (insert advice here):

1. Take all outdoors temporarily, flush with only water, when dry, fertilize at 1,300-1,350 ppm each other watering.

2. Take outdoors, flush all with water only, then return to current nutrient concentration, but fertilize each third watering.

3. Decrease the light intensity to what it was previously by raising the fixtures 4-6 inches.

4. Go back to the nutrient solution balance/concentration/fertilization schedule I was using prior to 4/10/13.

5. Skip the hassle of a flush, and go right for the higher nutrient concentration.


The indoor plants receive light 24/7; the outdoor plants receive only natural light, with no light supplementation. Pictures attached.


P.S. I have only 1 profile, and I’m not a troll (just a long time lurker).


Please view my introduction essay; “Cosmic Spore’s Introduction Essay”.


Thanks nexus, enjoy.
 

Attachments

  • IMG_1450.JPG
    IMG_1450.JPG
    2.8 MB · Views: 0
  • IMG_1451.JPG
    IMG_1451.JPG
    2.9 MB · Views: 0
  • IMG_1459.JPG
    IMG_1459.JPG
    2.6 MB · Views: 0
  • IMG_1460.JPG
    IMG_1460.JPG
    2.2 MB · Views: 0
  • IMG_1461.JPG
    IMG_1461.JPG
    2.8 MB · Views: 0
  • IMG_1449.JPG
    IMG_1449.JPG
    4.4 MB · Views: 0
  • IMG_1448.JPG
    IMG_1448.JPG
    3.1 MB · Views: 0
  • IMG_1447.JPG
    IMG_1447.JPG
    3.7 MB · Views: 0
  • IMG_1445.JPG
    IMG_1445.JPG
    2.2 MB · Views: 0
  • IMG_1444.JPG
    IMG_1444.JPG
    2.3 MB · Views: 0
  • IMG_1443.JPG
    IMG_1443.JPG
    3 MB · Views: 0
  • IMG_1442.JPG
    IMG_1442.JPG
    2.3 MB · Views: 0
  • IMG_1441.JPG
    IMG_1441.JPG
    2.1 MB · Views: 0
  • IMG_1462.JPG
    IMG_1462.JPG
    3 MB · Views: 0
  • IMG_1463.JPG
    IMG_1463.JPG
    3.3 MB · Views: 0
  • Lights+2.JPG
    Lights+2.JPG
    2 MB · Views: 0
  • Lights.JPG
    Lights.JPG
    1.8 MB · Views: 0
  • pH+%26+ppm+adjusted.JPG
    pH+%26+ppm+adjusted.JPG
    2.2 MB · Views: 0
  • Just+Water.JPG
    Just+Water.JPG
    2.1 MB · Views: 0
  • Insects.JPG
    Insects.JPG
    2.2 MB · Views: 0
  • Insects+4.JPG
    Insects+4.JPG
    2.8 MB · Views: 0
  • Insects+3.JPG
    Insects+3.JPG
    2.4 MB · Views: 0
  • Insects+2.JPG
    Insects+2.JPG
    1.8 MB · Views: 0
  • IMG_1470.JPG
    IMG_1470.JPG
    2 MB · Views: 0
  • IMG_1469.JPG
    IMG_1469.JPG
    2.8 MB · Views: 0
  • IMG_1465.JPG
    IMG_1465.JPG
    2.3 MB · Views: 0
  • IMG_1464.JPG
    IMG_1464.JPG
    1.7 MB · Views: 0
  • outdoor.JPG
    outdoor.JPG
    2.3 MB · Views: 0
  • Humidifier.JPG
    Humidifier.JPG
    1.9 MB · Views: 0
  • IMG_1426.JPG
    IMG_1426.JPG
    3.3 MB · Views: 0
  • IMG_1424.JPG
    IMG_1424.JPG
    3.1 MB · Views: 0
  • IMG_1423.JPG
    IMG_1423.JPG
    3.1 MB · Views: 0
  • IMG_1422.JPG
    IMG_1422.JPG
    2.6 MB · Views: 0
  • IMG_1421.JPG
    IMG_1421.JPG
    3.1 MB · Views: 0
  • IMG_1420.JPG
    IMG_1420.JPG
    3.4 MB · Views: 0
  • IMG_1419.JPG
    IMG_1419.JPG
    2.9 MB · Views: 0
  • IMG_1418.JPG
    IMG_1418.JPG
    3 MB · Views: 0
  • IMG_1417.JPG
    IMG_1417.JPG
    2.8 MB · Views: 0
  • IMG_1416.JPG
    IMG_1416.JPG
    2.8 MB · Views: 0
  • IMG_1415.JPG
    IMG_1415.JPG
    3 MB · Views: 0
  • IMG_1414.JPG
    IMG_1414.JPG
    2.7 MB · Views: 0
  • IMG_1427.JPG
    IMG_1427.JPG
    3 MB · Views: 0
  • IMG_1428.JPG
    IMG_1428.JPG
    3 MB · Views: 0
  • IMG_1440.JPG
    IMG_1440.JPG
    3.3 MB · Views: 0
  • IMG_1439.JPG
    IMG_1439.JPG
    3.5 MB · Views: 0
  • IMG_1438.JPG
    IMG_1438.JPG
    3.7 MB · Views: 0
  • IMG_1437.JPG
    IMG_1437.JPG
    2.7 MB · Views: 0
  • IMG_1436.JPG
    IMG_1436.JPG
    3.3 MB · Views: 0
  • IMG_1435.JPG
    IMG_1435.JPG
    4 MB · Views: 0
  • IMG_1434.JPG
    IMG_1434.JPG
    2.1 MB · Views: 0
  • IMG_1433.JPG
    IMG_1433.JPG
    2.5 MB · Views: 0
  • IMG_1432.JPG
    IMG_1432.JPG
    2.4 MB · Views: 0
  • IMG_1431.JPG
    IMG_1431.JPG
    2.5 MB · Views: 0
  • IMG_1430.JPG
    IMG_1430.JPG
    2.4 MB · Views: 0
  • IMG_1429.JPG
    IMG_1429.JPG
    2.9 MB · Views: 0
  • IMG_1425.JPG
    IMG_1425.JPG
    3.7 MB · Views: 0
These picture are from today, 4/15/13/.
 

Attachments

  • IMG_1495.JPG
    IMG_1495.JPG
    3 MB · Views: 0
  • IMG_1494.JPG
    IMG_1494.JPG
    2.8 MB · Views: 0
  • IMG_1493.JPG
    IMG_1493.JPG
    2 MB · Views: 0
  • IMG_1492.JPG
    IMG_1492.JPG
    2.2 MB · Views: 0
  • IMG_1491.JPG
    IMG_1491.JPG
    2.2 MB · Views: 0
  • IMG_1490.JPG
    IMG_1490.JPG
    2.7 MB · Views: 0
  • IMG_1489.JPG
    IMG_1489.JPG
    2.5 MB · Views: 0
  • IMG_1496.JPG
    IMG_1496.JPG
    2.5 MB · Views: 0
  • IMG_1497.JPG
    IMG_1497.JPG
    2.3 MB · Views: 0
  • IMG_1498.JPG
    IMG_1498.JPG
    2.9 MB · Views: 0
  • IMG_1499.JPG
    IMG_1499.JPG
    3.2 MB · Views: 0
  • IMG_1500.JPG
    IMG_1500.JPG
    2.4 MB · Views: 0
  • IMG_1501.JPG
    IMG_1501.JPG
    2.6 MB · Views: 0
  • IMG_1502.JPG
    IMG_1502.JPG
    2.5 MB · Views: 0
  • IMG_1503.JPG
    IMG_1503.JPG
    2.2 MB · Views: 0
  • IMG_1504.JPG
    IMG_1504.JPG
    2.4 MB · Views: 0
  • IMG_1488.JPG
    IMG_1488.JPG
    2.7 MB · Views: 0
  • IMG_1487.JPG
    IMG_1487.JPG
    3.2 MB · Views: 0
  • IMG_1471.JPG
    IMG_1471.JPG
    3.5 MB · Views: 0
  • IMG_1472.JPG
    IMG_1472.JPG
    2.2 MB · Views: 0
  • IMG_1473.JPG
    IMG_1473.JPG
    2 MB · Views: 0
  • IMG_1474.JPG
    IMG_1474.JPG
    3.2 MB · Views: 0
  • IMG_1475.JPG
    IMG_1475.JPG
    2.2 MB · Views: 0
  • IMG_1476.JPG
    IMG_1476.JPG
    2.2 MB · Views: 0
  • IMG_1477.JPG
    IMG_1477.JPG
    2.9 MB · Views: 0
  • IMG_1478.JPG
    IMG_1478.JPG
    2.1 MB · Views: 0
  • IMG_1479.JPG
    IMG_1479.JPG
    2.2 MB · Views: 0
  • IMG_1486.JPG
    IMG_1486.JPG
    2.5 MB · Views: 0
  • IMG_1485.JPG
    IMG_1485.JPG
    3 MB · Views: 0
  • IMG_1484.JPG
    IMG_1484.JPG
    3 MB · Views: 0
  • IMG_1483.JPG
    IMG_1483.JPG
    2.4 MB · Views: 0
  • IMG_1482.JPG
    IMG_1482.JPG
    2.7 MB · Views: 0
  • IMG_1481.JPG
    IMG_1481.JPG
    2.3 MB · Views: 0
  • IMG_1480.JPG
    IMG_1480.JPG
    2.1 MB · Views: 0
Dammit man you don't have to upload all your photos! I am confident most of us would have gotten an erection with just 10% of your uploaded pics.

Also, you got a problem with whitefly as I noticed. If untreated, your garden is doomed.
 
whitechapel47 said:
congratulations!!! thats a very very cool project you got going on there:thumb_up: :thumb_up: :thumb_up:

Thank you Whitechapel47, I am certainly enjoying taking care of these plants, and I encourage everyone interested in Salvia to try to grow them.


Dioxippus said:
be proud of those plants my friend

:) I certainly am proud of them... that's partly what's up with all the pictures; also, if a picture is worth 1,000 words, then this thread will be worth 100,000's of words about them.


Infundibulum said:
Dammit man you don't have to upload all your photos! I am confident most of us would have gotten an erection with just 10% of your uploaded pics.

Also, you got a problem with whitefly as I noticed. If untreated, your garden is doomed.

Infundibulum, I will accept that as a valuable compliment; another reason I intended to add so many pictures, is that I wanted to increase my credibility on the Nexus... rather than saying that I had so many, and posting only a small % of the pictures. I have treated the whitefly with a pesticide named Bengal; it temporarily reduced the numbers of them, but apparently I must reapply it.


Overnight the local temperature lowered to 34 degrees Fahrenheit; I had read that they're hardy to 32 degrees F., and wondered if the plants could handle 34-38 degrees... They survived 34 degrees F. with few symptoms (symptoms present could be due to excess moisture within the soil).

Happy 420 people.
 

Attachments

  • IMG_1517.JPG
    IMG_1517.JPG
    3.3 MB · Views: 0
  • IMG_1518.JPG
    IMG_1518.JPG
    3 MB · Views: 0
  • IMG_1519.JPG
    IMG_1519.JPG
    2.3 MB · Views: 0
  • IMG_1520.JPG
    IMG_1520.JPG
    2.1 MB · Views: 0
  • IMG_1521.JPG
    IMG_1521.JPG
    1.8 MB · Views: 0
  • IMG_1522.JPG
    IMG_1522.JPG
    2.9 MB · Views: 0
  • IMG_1523.JPG
    IMG_1523.JPG
    2.2 MB · Views: 0
  • IMG_1524.JPG
    IMG_1524.JPG
    1.9 MB · Views: 0
  • IMG_1526.JPG
    IMG_1526.JPG
    1.8 MB · Views: 0
  • IMG_1516.JPG
    IMG_1516.JPG
    3.1 MB · Views: 0
  • IMG_1515.JPG
    IMG_1515.JPG
    2.9 MB · Views: 0
  • IMG_1514.JPG
    IMG_1514.JPG
    3.3 MB · Views: 0
  • IMG_1505.JPG
    IMG_1505.JPG
    1.8 MB · Views: 0
  • IMG_1506.JPG
    IMG_1506.JPG
    2.9 MB · Views: 0
  • IMG_1507.JPG
    IMG_1507.JPG
    2.9 MB · Views: 0
  • IMG_1508.JPG
    IMG_1508.JPG
    3 MB · Views: 0
  • IMG_1509.JPG
    IMG_1509.JPG
    3.3 MB · Views: 0
  • IMG_1510.JPG
    IMG_1510.JPG
    2.9 MB · Views: 0
  • IMG_1511.JPG
    IMG_1511.JPG
    2.7 MB · Views: 0
  • IMG_1512.JPG
    IMG_1512.JPG
    2.2 MB · Views: 0
  • IMG_1513.JPG
    IMG_1513.JPG
    2.4 MB · Views: 0
Light pics
 

Attachments

  • IMG_1771.JPG
    IMG_1771.JPG
    2 MB · Views: 0
  • IMG_1770.JPG
    IMG_1770.JPG
    2 MB · Views: 0
  • IMG_1769.JPG
    IMG_1769.JPG
    1.8 MB · Views: 0
  • IMG_1768.JPG
    IMG_1768.JPG
    1.7 MB · Views: 0
  • IMG_1767.JPG
    IMG_1767.JPG
    1.6 MB · Views: 0
  • IMG_1766.JPG
    IMG_1766.JPG
    1.7 MB · Views: 0
  • IMG_1772.JPG
    IMG_1772.JPG
    2 MB · Views: 0
Back
Top Bottom