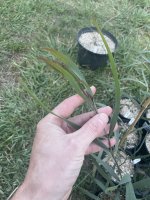
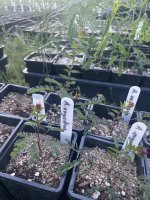
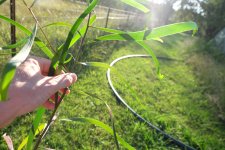
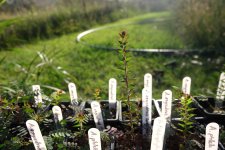
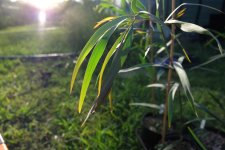
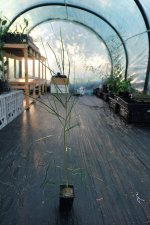
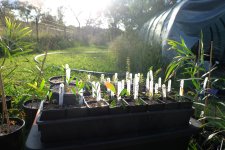
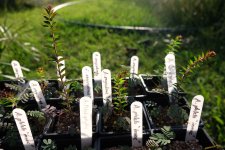
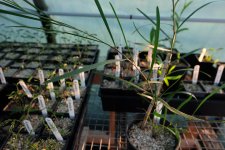
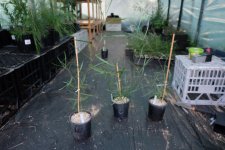
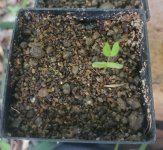
• Members of the previous forum can retrieve their temporary password here, (login and check your PM).

Botany The Acacia Grow Thread

Growing logs with advice and results.
Migrated topic.
TheAwakening said:
A few of the viable acuminata seeds have started to throw out their root. I'll give it a few more days before potting then up.

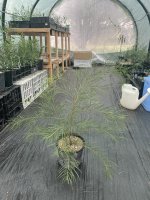
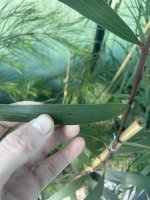
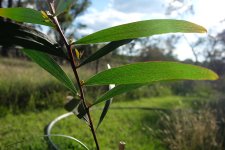
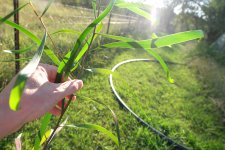
Awesome! Assuming narrow phyllode? Got some germing on my end as well.. maybe it will be a synchronized grow ;)

Looking forward to seeing your progress the red squirrel

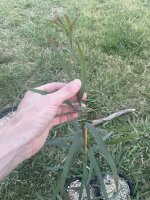
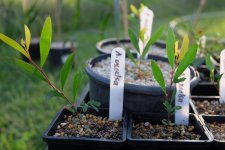
I would really love to see people's experiences growing Acacia simplex.. not a lot of info out there on cultivating it and a lot of misidentified seed has been getting around. I recall a few nexians dipping their toes into this one?

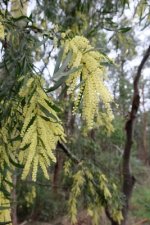
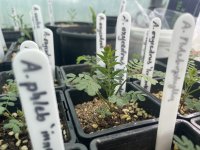
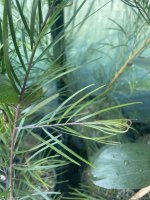
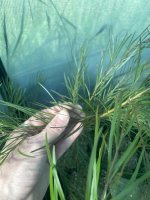
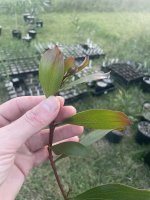
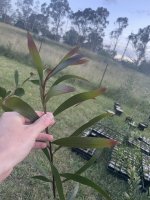
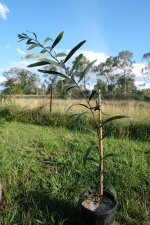
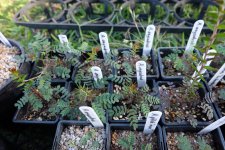
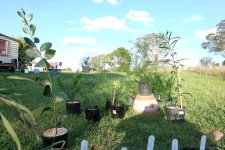
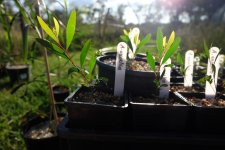
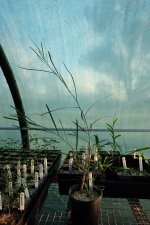
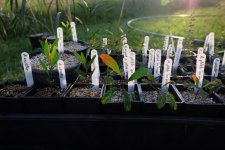
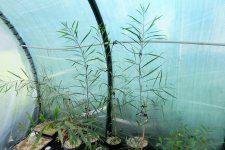
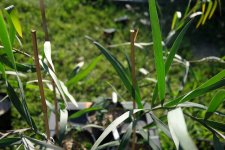
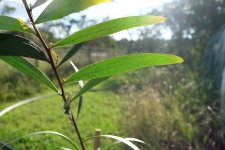
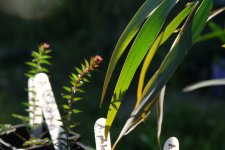
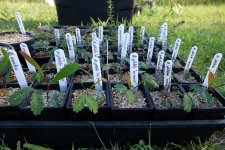
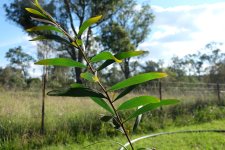
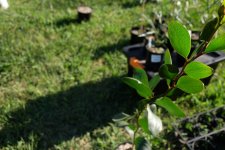
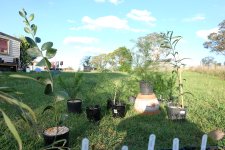
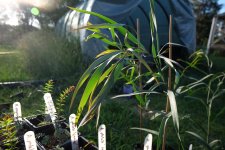
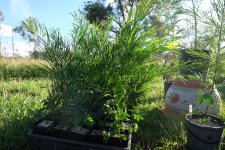
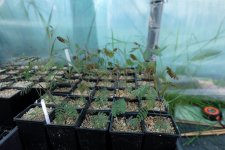
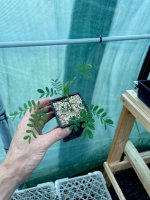
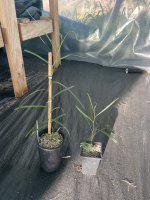
Here's another variety of floribunda and the enormous mother tree the seed came from.. it is the biggest floribunda I've seen. The trunk is over a meter in circumference and travels along the ground now. You could be mistaken thinking it is a patch of trees but they are actually all just huge trunk sized branches. Currently I just call it "small seed" as the seeds are much smaller than the other types I have.. the seedlings seem to start smaller and more delicate too but starting to take off and have a really nice display of juvenile leaves.

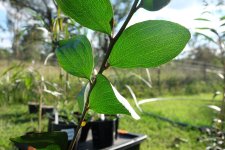
I think they are quintessential looking Acacia :)
 

Attachments

  • image_6483441+(6).JPG
    image_6483441+(6).JPG
    189.8 KB · Views: 5
  • active+flori.jpg
    active+flori.jpg
    77.6 KB · Views: 5
I ended up potting up the few acuminata seeds that show signs of life. One of them had sprouted way before the others and I took a picture of it which is below. Mix is about 3 parts coarse sand 1 part coco coir with a sprinkle of acacia soil mixed in.
 

Attachments

  • 20240124_215338.jpg
    20240124_215338.jpg
    334.4 KB · Views: 3
Hey thanks for the update TheAwakening... hope the lil fella grows tall and strong! I am starting to bond with acuminata more now that I am growing it.. I have always really enjoyed it in the wild but wasn't perhaps as drawn to it as other species.. this is starting to change. It really is a delightful plant! A subtle kind of grace..

I think the 70:30 coarse sand to peat/coir thing is fantastic.. far superior to any potting mix available that I have tried. Will be interested in how coarse sand in New Zealand works.. a little different to in Oz I imagine. It certainly looks much darker.. but so long as it is free draining and combined with the moisture absorbent qualities of the peat/coir I think should be pretty good.. do you have any info about the kind of environment it came from?

I am really enjoying the process of growing a tryptamine acacia garden.. spending time around these plants everyday is both exciting and soothing.. and incredibly grounding. Every plant contributes such a unique presence to the space.. feeling really blessed having them here
 
A little eye candy to enjoy..

First pic is a comparison between two Acacia caroleae.. the one on the right is 15 months of age - it was started in commercial seed raising mix and then planted in commercial potting mix. It was later transferred to my current medium after being stunted for several months. It is now growing healthily but only really just started taking off since spring.

Compare to the plant on the right that is 3 months of age.. it is quickly catching up and will soon surpass it's much older counterpart. It was sown directly into the current sand/peat/perlite mix.. suggesting that starting seedling in the right medium as early as possible makes a huge difference in growth rate.. I think developing a healthy tap root early on is probably pivotal in the plant's future growth.

Oh.. and I had to share our cute little friend making a home of the obtuse and phleb!
 

Attachments

  • image_67205377.png
    image_67205377.png
    12.8 MB · Views: 6
  • image_50446849.JPG
    image_50446849.JPG
    3 MB · Views: 5
  • 35120.jpg
    35120.jpg
    960.9 KB · Views: 5
  • image_50456577.JPG
    image_50456577.JPG
    1.6 MB · Views: 5
  • image_6483441+(7).png
    image_6483441+(7).png
    2.1 MB · Views: 6
Thought I'd take the new image uploading interface for a wee spin.. much more streamlined compared to the old system :)

First pic.. Acacia oxycedrus spikes finally revealing themselves :love: 
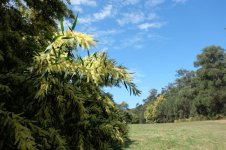
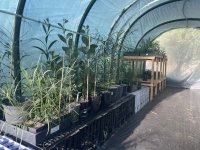
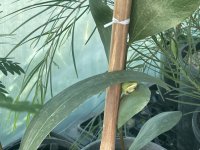
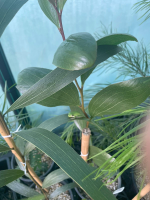
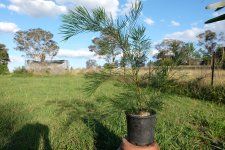
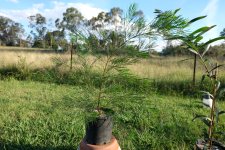
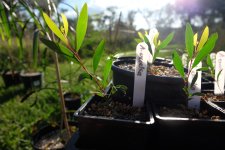
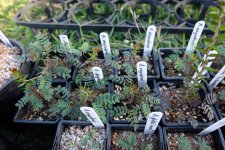
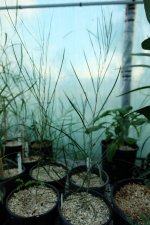
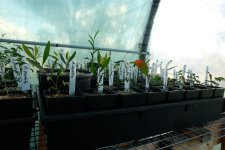
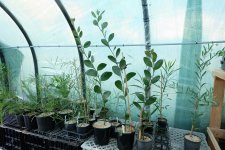
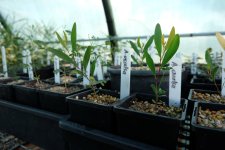
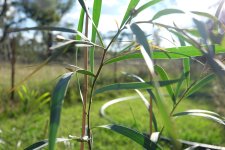
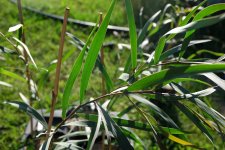
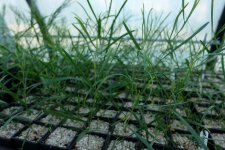
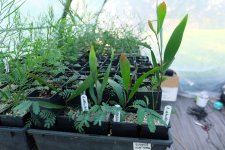
They took a while to form but are now growing pretty fast.

.. and then gotta appreciate for the thousandth time how well the 'white willow' Acacia floribunda is going.. starting to get its weeping habit! I am so in love with this plant.

I find it interesting with floribunda how it doesn't develop it's characteristic phyllodes until maturing quite a lot more. The tree which this seed came from had very broad phyllodes with complex nerve networks.. but at a young age just has 3-4 primary longitudinal nerves and no secondary nerves. Last photo is the tree the seed came from for reference.
 

Attachments

  • 29197732871_8fb3ceed1a_w (1).jpg
    29197732871_8fb3ceed1a_w (1).jpg
    45.3 KB · Views: 10
  • image_67190529.JPG
    image_67190529.JPG
    3 MB · Views: 10
  • image_50458369.JPG
    image_50458369.JPG
    1.8 MB · Views: 10
Beautiful bro! The plant's metamorphic qualities are quite beautiful and imo you only get a sense of that watching them grow from babies.

On my end I have some sad news. I gave my babies a water with seasol and the result was that something decided they were suddenly very tasty and ate all the bipinnate leaves off of them. There are maybe 2 that will make it. I feel quite sad but also reflective, maybe they don't do well with a feed (and seasol isn't exactly a hefty fertilizer) until after phyllodes come. What have others experiences been in this regard?

On the plus side a wonderful acacia loving forum member has sent me some seeds to give a whirl so I'll get them soaking soon!
 
Yeah it’s amazing how growing them helps you understand the plant more deeply. I am really enjoying it.

I’m sorry to hear about your plants! It’s an awful feeling.. although at least we don’t repeat the same mistakes again! Good luck with the seeds.. hope they grow into big trees.

I use season once every few weeks and haven’t had problems. The only issues I have with plants getting eaten is when they first sprout.. I now cover them with glass or plastic when they are sprouting as it hurt my soul seeing plants getting chomped.
 
I've just started with some acuminata np and floribunda that some one with an active garden gifted me.

Great idea for a thread I'll follow along and learn what I can and post some results when I get them.
 
Awesome Phyllode_Pickler, look forward to hearing more from you.. and great name :)

I’ve been attempting to harden off my wattles out of the green house.. but I think I need to do so more gradually. I got busy with work and left them out for a few days. Last night I noticed they had gotten burnt and had some dark spots developing. Looks like I didn’t take my own advice with the hardening regime!

So for those using greenhouses.. something to be mindful of. It is probably more of an issue in high altitude areas like where I am.. the sun is much stronger.
 

Attachments

  • 4DA8DF49-2FDA-429E-9E83-74A8E958FD13.jpeg
    4DA8DF49-2FDA-429E-9E83-74A8E958FD13.jpeg
    1.9 MB · Views: 15
  • image.jpg
    image.jpg
    1.7 MB · Views: 15
  • image.jpg
    image.jpg
    1.9 MB · Views: 13
  • image.jpg
    image.jpg
    2 MB · Views: 16
Last edited:
Hey guys. Damn, that's annoying Acacian! The black spots on your Phleb kinda look like a disease. Your plants are inspiring! It might pay to harden off your wattles starting in Autumn so they don’t get hit so hard by the sun. This way they’ll have winter and spring preparing them for the summer light.

Ultimately, I think the key is to make the seedlings robust from a very early age so they don’t have any developmental problems further down the track. I often see wild acacia seedlings that have no problem growing up in full sun, they’re healthy and strong, so I think the problem with growing seedlings like we are is likely due to overwatering and the lack of direct sun and wind from a young age which causes weakness in the plant.

For my seedlings, Ive started watering them less; training them to be more drought tolerant (re-watering every 3 days or so). I keep a window open so they have to battle a breeze and I give them mid arvo sun for about 3-4hrs - not always direct light but a lot of strong ambient light. The new phyllodes are often exhausted by the end of the day but then return to normal again overnight. I’m trying not to baby my seedlings in the hope they will cope better when planting them outdoors but it’s a tricky one. When I eventually plant them I’ll make sure they are orientated in a spot that gets similar afternoon light as they were raised in.

@The Awakening, my main problem with growing seedlings so far has been pests. The most damaging being leaf miners (see photos).

_DSC9874.JPG_DSC9889.JPG_DSC9894.JPG
 
Well said CheeseCat.. hardening them at a young age is important. I suppose one think to remember though.. seedlings in the wild would be growing in a kind of micro climate of their own, being amongst the foliage of other plants.. so when they are at their juvenile stage it would be rare for them to be getting such direct light (at least those that grow in forests) or wind. I have found direct sun at a very early age seems to kill a lot of seedlings.. but once they have several nodes and are a bit taller it’s pretty natural for them to peek through to the direct sun.

I think you are right about hardening in autumn.. they seem to be struggling a bit left out in this hot summer sun. But it does seem to be hardening them still.. stems are getting stronger which is great. I think doing so gradually is key if they have been grown in a green house. An hr a day to begin with.. maybe a couple hrs the next week. And so on so forth
 
I think I've messed the first few seeds up. I nicked the edge of the seed with a sharp blade and covered in boiling water overnight. Next day planted them into peat moss. 1 week on it looks like the seeds have turned to mush for the acuminata, the floribunda look like they might still do their thing.

I checked out some different videos on propagation, it looks like I should be using some soil from a live Acacia tree to infect the new soil/seed and help the process. I just happened to find a tree a few blocks from where I live that should be happy to donate some soil to the cause. I also saw that no one else was putting a small nick in the edge of the seed.

I will hopefully have better news in a few weeks.
 
Inoculation will help but its certainly not essential.. I inoculate very few of my seeds. Are you being careful during the nicking process? I would recommend using a nail file.. a blade runs the risk of chipping off the seed underneath the outer coat.
 
Inoculation will help but its certainly not essential.. I inoculate very few of my seeds. Are you being careful during the nicking process? I would recommend using a nail file.. a blade runs the risk of chipping off the seed underneath the outer coat.
Thanks for the reply, I will try a nail file this time. It's very possible I clipped the seed with the blade.
 
No problem :)

just back to inoculation.. many people find doing so speeds up growth significantly. But its not the only way to introduce the rhizobium bacteria to your plant.. and stirring soil through your water can cause complications when germinating on a damp towel. If germinating on wet towel you want a fairly sterile environment as mold can grow very easily - particularly in the warmer months. You could work around this by rinsing the seeds thoroughly before germinating. You can also add rhizome rich soil into your potting medium that you plant your seed/seedling in to reap the bacterial benefits.

Nailing your growing medium is perhaps the most important thing when starting an Acacia. They generally don't do so well with wet feet - so a well draining mix is pretty essential for fast growth.. There are exceptions I am sure - like some of the more swampy species.

The mix that so far is working best for me and which I am comfortable recommending, is coarse river sand, peat moss and perlite - at a ratio of about 60:30:10. Peat can be substituted for coco coir too.

Just to note: using a sandy mix means the potential for the medium to fall through the pot when it dries out and the roots haven't bound it together yet. So what I do when potting up is have the mix already damp, fill the pot with about an inch of medium, and firmly tamp it down before I add the rest on top. That way the mix at the bottom of the pot isn't so loose that it will fall through, but the rest of the mix above it is light enough that the roots can move through it easily.

If planting in square forestry tubes, you can make a tamper by duck taping the bottom of one of your tubes and just pressing that down on the little bit of medium at the bottom of your pot. Maybe I will make a video .. is kind of hard to describe.

When your plant's roots aren't well established, best to water it very gently. A mister works well. Once the roots have bound the medium together a little you can water more aggressively.
 
Thank you again for the in depth information.

After reading through a few times I think the plan is going to be scoring the seed with a nail file, boiling water, then into the paper towel, into a pot with sand, peat moss and perlite with some of the soil from the mature tree mixed in. I think I'll skip the propagation tray with humidity lid and just mist them each day with a fine spray.

I was very surprised with how much sand there was in the soil when I went to look at the mature tree growing near by.
 
Don't use boiling water on already scarified seeds... it is only to penetrate the outer coat on untreated seeds, causing them to swell. Doing so to an already scarified seed will probably kill it. Filing it down or nicking it means that it no longer requires heat to swell in water. Once swollen you can either sow straight into your potting mix or you can germinate them in darkness on a damp towel. Putting a mug over the top works well. :)

Just be careful not to hit the inner layer that contains the cotyledon.. this is why using a razor blade or scissors is risky compared to say a nail file which is more gradual.

Boiling seeds without scarifying them works fine too.. if using bulk seeds I'd just do that. If you have limited seeds or they are very precious to you then filing it down carefully and soaking in cold water will give you better results.

Hope to see some of your plants soon Phyllode_Pickler!
 
Whole lotta red in the tryptamine garden.. now that I have my plants out of the greenhouse they are getting these beautiful vibrant tips
 

Attachments

  • 1E8C4A21-74F5-47D6-930B-C3D80B6A67CC.jpeg
    1E8C4A21-74F5-47D6-930B-C3D80B6A67CC.jpeg
    1.7 MB · Views: 12
  • 61CA6E74-D6A4-4E0D-9D51-69787926CD27.jpeg
    61CA6E74-D6A4-4E0D-9D51-69787926CD27.jpeg
    1.6 MB · Views: 7
  • 826C57F8-692E-46F4-A6FD-2DD827CFDC53.jpeg
    826C57F8-692E-46F4-A6FD-2DD827CFDC53.jpeg
    1.9 MB · Views: 7
  • 01E6DB4C-7C2E-4E85-9B54-0378B29B3AF2.jpeg
    01E6DB4C-7C2E-4E85-9B54-0378B29B3AF2.jpeg
    1.9 MB · Views: 10
  • 5501738F-7FE1-491E-B332-6E2697117E12.jpeg
    5501738F-7FE1-491E-B332-6E2697117E12.jpeg
    1.6 MB · Views: 11
Nice afternoon photoshoot with my acacian friends.. I just love seeing the afternoon sun shine through the nerve networks.. and doing so with a torch at night is spectacular too. Hanging in the green house at night is really special..
 

Attachments

  • DSCF4305.JPG
    DSCF4305.JPG
    4 MB · Views: 4
  • DSCF4283.JPG
    DSCF4283.JPG
    2.4 MB · Views: 3
  • DSCF4281.JPG
    DSCF4281.JPG
    6.1 MB · Views: 4
  • DSCF4275.JPG
    DSCF4275.JPG
    5.6 MB · Views: 2
  • DSCF4266.JPG
    DSCF4266.JPG
    3.6 MB · Views: 2
  • DSCF4255.JPG
    DSCF4255.JPG
    4.4 MB · Views: 2
  • DSCF4258.JPG
    DSCF4258.JPG
    3.2 MB · Views: 3
  • DSCF4251.JPG
    DSCF4251.JPG
    3.7 MB · Views: 2
  • DSCF4245.JPG
    DSCF4245.JPG
    2.8 MB · Views: 3
  • DSCF4314.JPG
    DSCF4314.JPG
    4 MB · Views: 2
  • DSCF4327.JPG
    DSCF4327.JPG
    3.3 MB · Views: 3
  • DSCF4336.JPG
    DSCF4336.JPG
    6.2 MB · Views: 3
  • DSCF4260.JPG
    DSCF4260.JPG
    3 MB · Views: 2
  • DSCF4254.JPG
    DSCF4254.JPG
    4.4 MB · Views: 2
  • DSCF4451.JPG
    DSCF4451.JPG
    1.7 MB · Views: 2
  • DSCF4447.JPG
    DSCF4447.JPG
    3.9 MB · Views: 3
  • DSCF4445.JPG
    DSCF4445.JPG
    2.6 MB · Views: 2
  • DSCF4451.JPG
    DSCF4451.JPG
    1.7 MB · Views: 2
  • DSCF4440.JPG
    DSCF4440.JPG
    3.7 MB · Views: 2
  • DSCF4367.JPG
    DSCF4367.JPG
    1.2 MB · Views: 2
  • DSCF4350.JPG
    DSCF4350.JPG
    6.3 MB · Views: 2
  • DSCF4240.JPG
    DSCF4240.JPG
    2.9 MB · Views: 2
  • DSCF4226.JPG
    DSCF4226.JPG
    3.8 MB · Views: 4
  • DSCF4204.JPG
    DSCF4204.JPG
    3.7 MB · Views: 4
  • DSCF4312.JPG
    DSCF4312.JPG
    4.1 MB · Views: 5
  • DSCF4306.JPG
    DSCF4306.JPG
    4 MB · Views: 3
  • DSCF4443.JPG
    DSCF4443.JPG
    3.9 MB · Views: 6
  • DSCF4179.JPG
    DSCF4179.JPG
    3.4 MB · Views: 6
  • DSCF4380.JPG
    DSCF4380.JPG
    6.7 MB · Views: 7
  • DSCF4315.JPG
    DSCF4315.JPG
    3 MB · Views: 7
  • DSCF4281.JPG
    DSCF4281.JPG
    6.1 MB · Views: 5
  • DSCF4194.JPG
    DSCF4194.JPG
    4.2 MB · Views: 3
  • DSCF4245.JPG
    DSCF4245.JPG
    2.8 MB · Views: 2
  • DSCF4336.JPG
    DSCF4336.JPG
    6.2 MB · Views: 3
  • DSCF4342.JPG
    DSCF4342.JPG
    6.6 MB · Views: 2
  • DSCF4270.JPG
    DSCF4270.JPG
    3.7 MB · Views: 2
  • DSCF4194.JPG
    DSCF4194.JPG
    4.2 MB · Views: 1
  • DSCF4267.JPG
    DSCF4267.JPG
    3.6 MB · Views: 0
  • DSCF4232.JPG
    DSCF4232.JPG
    3.7 MB · Views: 0
  • DSCF4253.JPG
    DSCF4253.JPG
    4.3 MB · Views: 3
  • DSCF4219.JPG
    DSCF4219.JPG
    4.6 MB · Views: 3
  • DSCF4200.JPG
    DSCF4200.JPG
    3.3 MB · Views: 3
  • DSCF4181.JPG
    DSCF4181.JPG
    3.4 MB · Views: 2
  • DSCF4183.JPG
    DSCF4183.JPG
    4 MB · Views: 1
  • DSCF4176.JPG
    DSCF4176.JPG
    4.2 MB · Views: 1
  • DSCF4283.JPG
    DSCF4283.JPG
    2.4 MB · Views: 2
  • DSCF4182.JPG
    DSCF4182.JPG
    3.4 MB · Views: 3
  • DSCF4193.JPG
    DSCF4193.JPG
    4.2 MB · Views: 4
  • DSCF4231.JPG
    DSCF4231.JPG
    3.7 MB · Views: 3
  • DSCF4240.JPG
    DSCF4240.JPG
    2.9 MB · Views: 1
  • DSCF4270.JPG
    DSCF4270.JPG
    3.7 MB · Views: 2
  • DSCF4335.JPG
    DSCF4335.JPG
    6.3 MB · Views: 2
  • DSCF4314.JPG
    DSCF4314.JPG
    4 MB · Views: 4
  • DSCF4358.JPG
    DSCF4358.JPG
    4.2 MB · Views: 3
  • DSCF4317.JPG
    DSCF4317.JPG
    3.9 MB · Views: 1
  • DSCF4309.JPG
    DSCF4309.JPG
    6.6 MB · Views: 2
  • DSCF4188.JPG
    DSCF4188.JPG
    4.2 MB · Views: 3
  • DSCF4447.JPG
    DSCF4447.JPG
    3.9 MB · Views: 2
  • DSCF4444.JPG
    DSCF4444.JPG
    4 MB · Views: 3
  • DSCF4361.JPG
    DSCF4361.JPG
    4.5 MB · Views: 1
  • DSCF4367.JPG
    DSCF4367.JPG
    1.2 MB · Views: 2
  • DSCF4397.JPG
    DSCF4397.JPG
    3.9 MB · Views: 2
  • DSCF4345.JPG
    DSCF4345.JPG
    3.7 MB · Views: 5
Last edited:
Back
Top Bottom